|
|
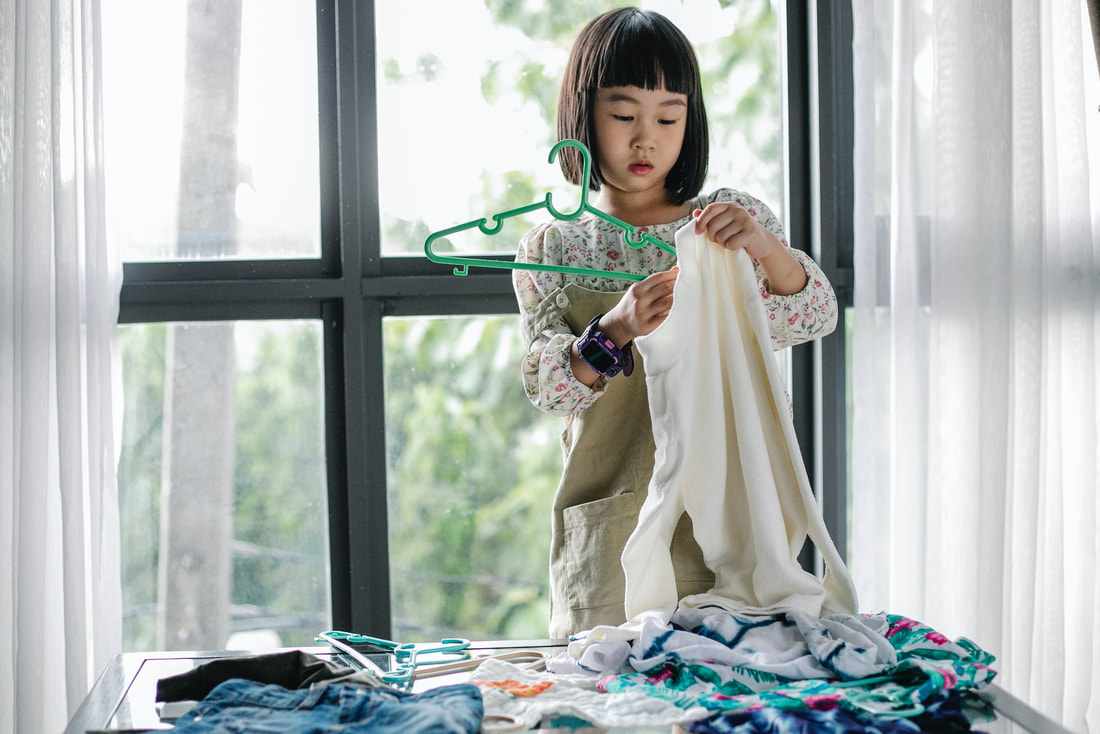 As an organizer, I've been told many times and in a variety of ways, "I just don't have the organizing gene." It is true that organization comes naturally to some people, and for others it is more of a struggle. That said, organization is a skill, or set of skills, and as such, it can be learned...and taught. If you are raising children, organization skills are some of the best skills you can instill in them. Teaching organization skills to children will benefit them in a variety of ways. Children with organization skills are able to:
Instill Good HabitsTeaching organization skills to children begins with instilling good habits. This can be accomplished in a variety of ways. The more approaches that are utilized, the more likely children are to understand, master, and adopt the skills you're trying to teach. Try implementing the following:
These are just a few examples of things you can do to help instill good habits in your children, and the best part is that all of these skills benefit you as well!  Set Them Up for SuccessThere are a number of things that parents and caregivers can do to help children learn organization skills with greater ease. Consider the following:
Provide MotivationMotivation is both a catalyst and an inducement. It is also a self-sustaining phenomenon. Motivation prompts us to act. When we act, we experience success, and success fuels our motivation to continue to act. Motivation can be external (think catalyst/inducement) or internal (desire for success). As a parent or caregiver, there are numerous things you can do to provide motivation to encourage children to do the things that will instill good habits.
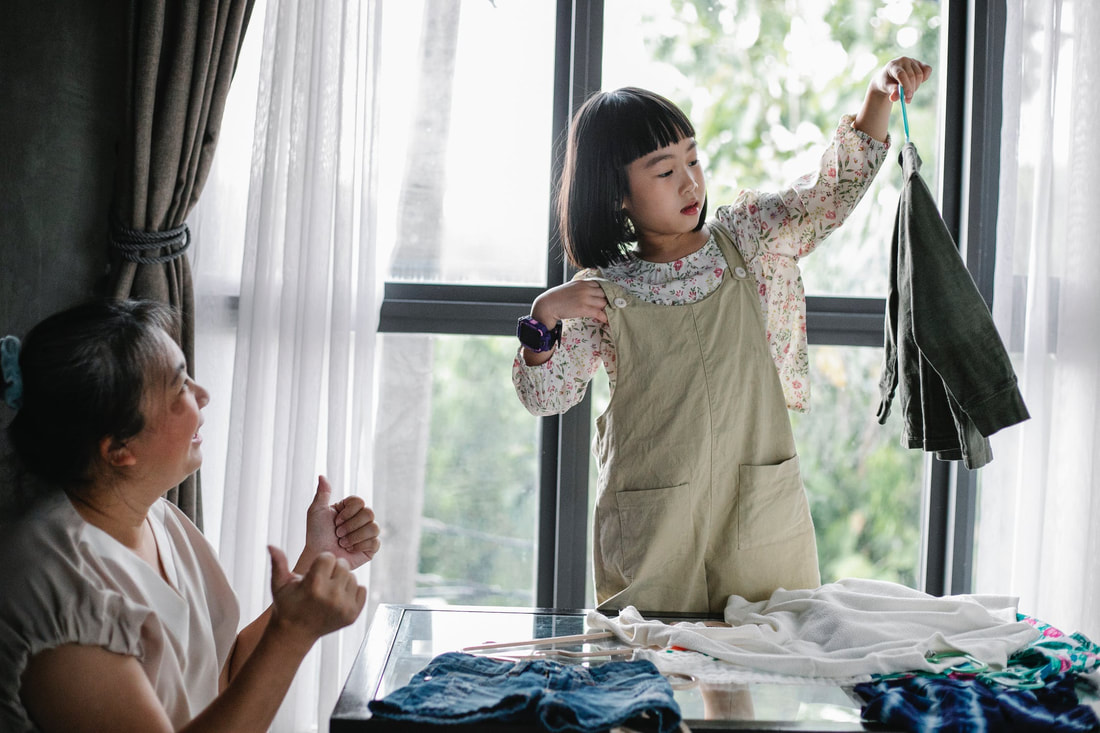 Be an ExamplePerhaps the most important thing you can do to instill good habits in children is to set an example of the behaviors you want them to adopt. In the case of developing organization skills, you can do this by creating and maintaining an organized space. It all starts with having a place for things, knowing where things are, and putting things away consistently. It's also important to practice what you preach, so to speak. Follow the advice you give and the guideline you establish. Let them see the benefits of adopting these behaviors by observing you. 
14 Comments
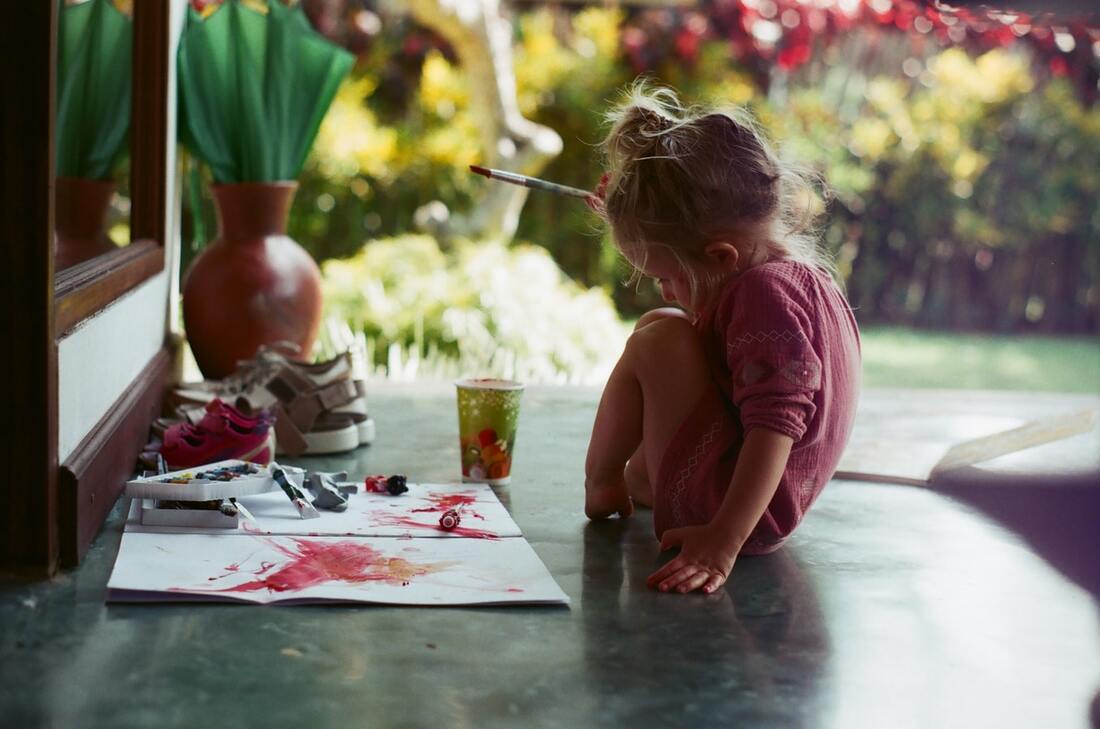 Young children often find tremendous satisfaction and delight in creating works of art. Indeed, many children are prolific artists. Storing and displaying all their creations can present a bit of a challenge for parents. For one thing (if we're being totally honest), not everything they draw, paint, or color is worthy of exibition. In addition, most of the art they produce is on cheap paper that tends to yellow, wrinkle, and curl over time. Then there is the children's own insistance that their work be kept and preserved which requires both display and storage space. With a little planning it is possible to develop a system for curating children's artwork that will satisfy everyone's needs and desires. AFFILIATE DISCLOSURE: This post contains affiliate links. This just means that there are product suggestions included within the text. Should you click on one of the links and decide to make a purchase, I will receive a small commission. I only suggest products I love and and have experience with that are directly related to the content in this post. You can view my Disclosure Statement for more information. Thank you for your support!
I recommend designating a specific space in your home for displaying your child's artwork and then rotating pieces over time as new ones are created. This will help prevent pieces on display from degrading over time and keep the exhibit fresh and interesting. In addition to that old favorite the refrigerator, possible candidates for display space include a hallway, kids' playroom, family room, stairway or entry. Personally, I like to choose a space that visitors are sure to see.
A simple Google search will yield hundreds of examples of ways to display children's artwork. Here are a few of my personal favorites: Frame It: Consider framing special pieces for added impact and appeal. I love float frames for this purpose as they tend to really catch the eye and make whatever is framed in them stand out against the background. Since kids' artwork is often produced on oversized paper, I recommend 11" x 14" frames at a minimum. With a float frame, it's okay if the piece is smaller than the frame - better to have extra space than to have to trim a piece down to fit the frame. If you don't want to spend the money on frames, you can create your own using a variety of mediums. For oversized or oddly shaped pieces, you can use scrap wood to create a custom frame like the one shown here that we made to show off our son's rather large drawing of a buffalo which is currently on display in our playroom. 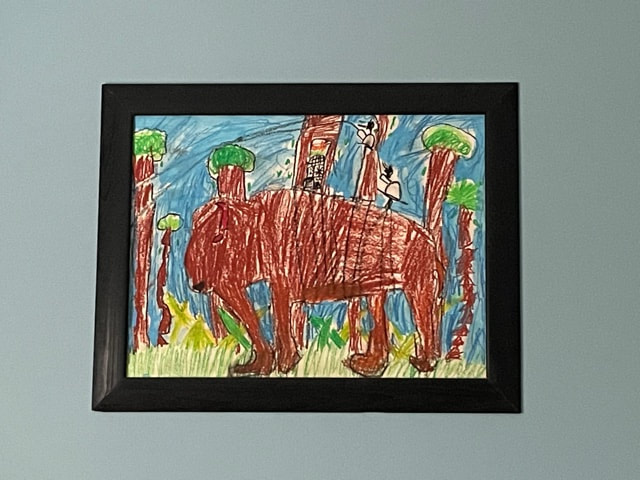 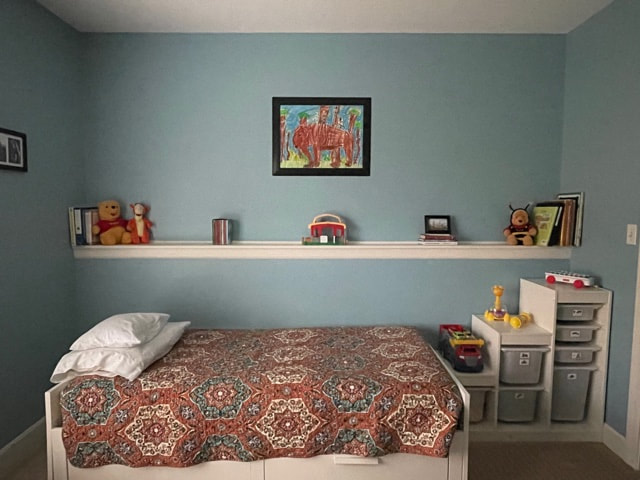 A whimsical and unique way to "frame" children's artwork is by creating outlines on a wall using strips of trim, paint, or Washi tape as shown below. A fun bonus of this approach is the ability to easily switch out works of art with little effort. 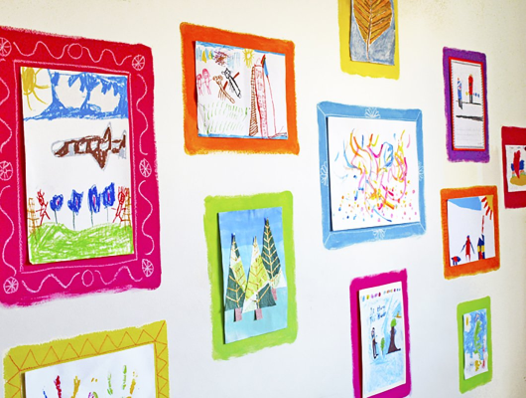 I love this vibrant display wall from artful-kids.com. The use of colored chalkboard paint allows you to create individualized designs around the edges of your frames, adding an even greater one-of-a-kind vibe to your gallery. Perhaps the thing I love most about it, though, is the imperfect nature of the blocks of color. There is no attempt here to create sharp, crisp edges. To me, this adds to the charm and playfulness of the display. 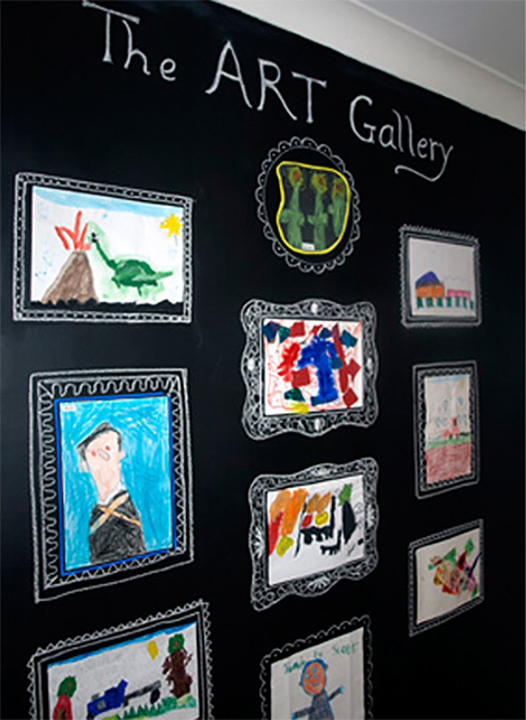 Speaking of chalkboard paint, here's another idea from artful-kids.com. In this case, the entire wall has been painted with black chalkboard paint, and individual frames drawn on with chalk. The nice thing about this is that you can switch out pieces by erasing the old frame and drawing in a new one specifically designed to fit and showcase the artwork it surrounds. 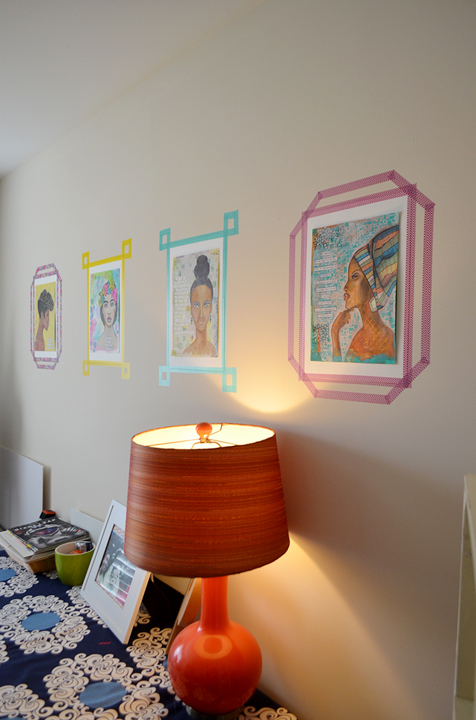 Washi tape comes in a seemingly endless array of colors and patterns, making it an extremely versatile medium, as demonstrated here by Jennae of greenyourdecor.com. It won't damage your walls, and it's easy to remove and redo, allowing you to change things up to accomodate new creations over time. 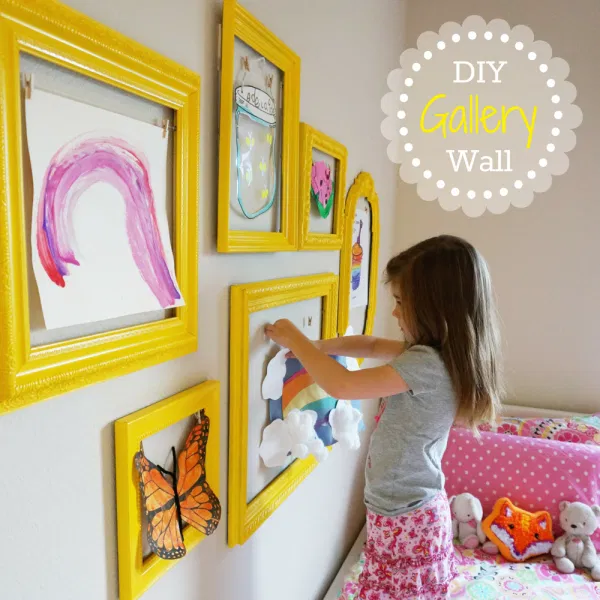 For those of us who aren't entirely confident in our ability to freehand things, a simple solution is to hang picture frames minus their glass inserts and backing. Paint them a lively color as demonstrated here by Heather from thecaterpillaryears.com. You can paint them all one unifying color as shown or choose an assortment of bright hues for a sort of rainbow effect. You could also select colors to coordinate with the room's decor. Hang It: The benefit of hanging artwork is that it is super easy to switch out pieces. The drawback is that the edges of the artwork have a tendancy to curl up over time. A great way to prevent curling edges is to slide the artwork into a clear plastic sleeve before hanging it. There are lots of fun ways to hang kids' artwork. Here are a few of my favorites: 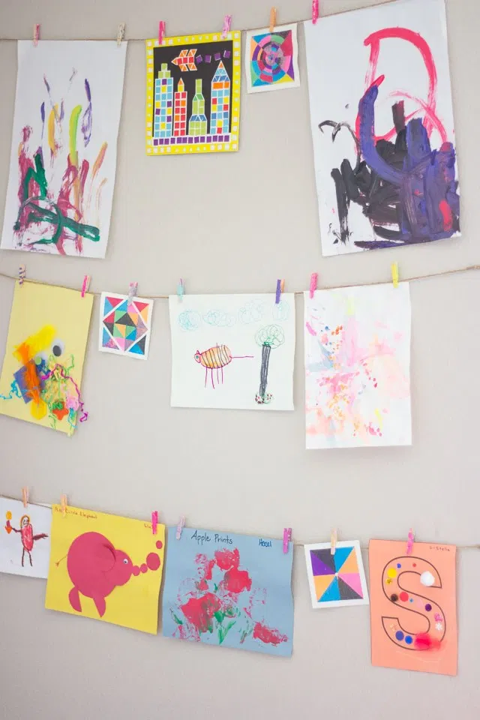 Get yourself some colorful mini clothespins and some natural jute twine (which comes in a variety of colors), and string up a simple "clothesline" like this one by Haeley from designimprovised.com. 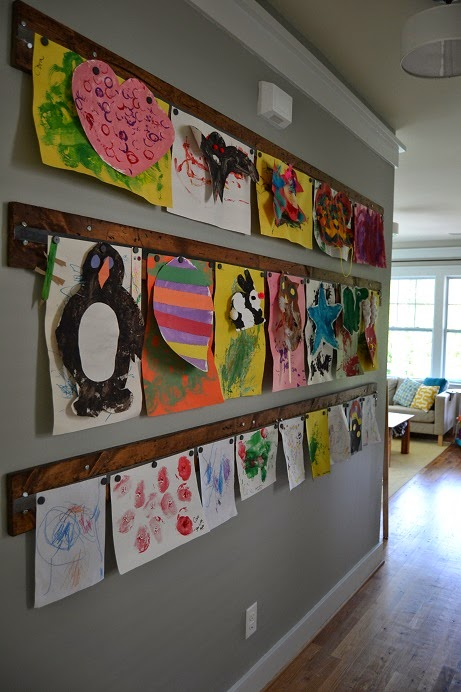 For a sturdier solution, hang magnetic strips mounted to boards. This example comes from Laura at Never Listless. Finish it off with some fun, colorful circle magnets and you're all set! 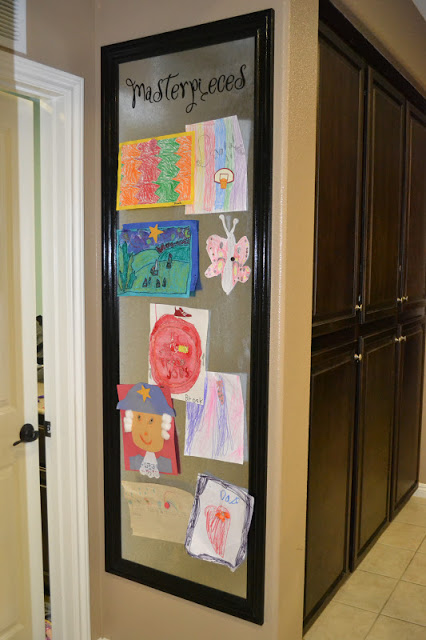 Keeping with the magnetic theme, why not try this idea by Melissa from Inspiration Organization. Frame a piece of sheet metal to create a versatile display board. 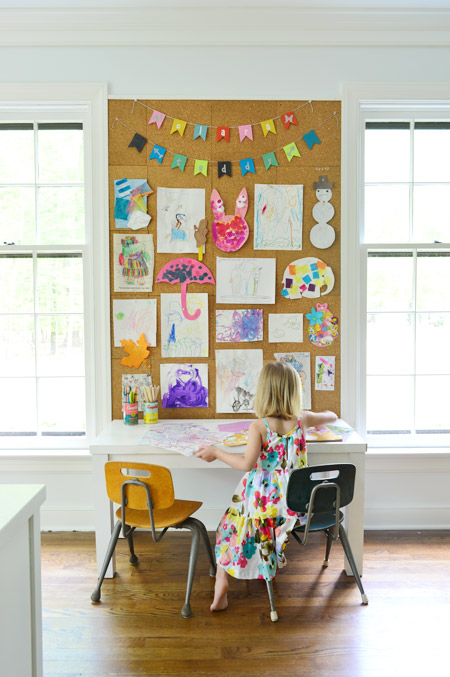 If sheet metal makes you nervous, you might try a similar concept using cork. This example from John and Sherry at Young House Love utilized cork tiles. 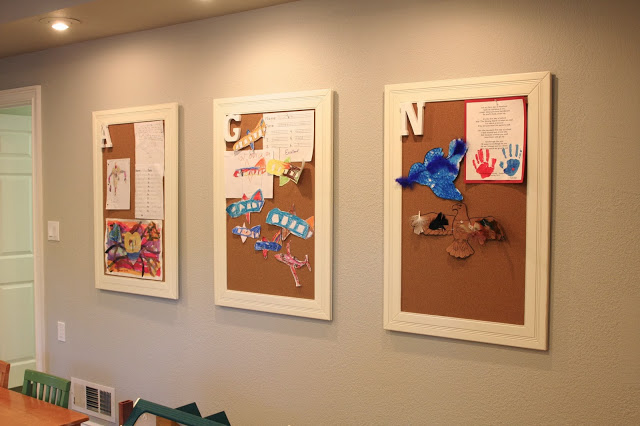 This modified version of a cork display board by Samantha at Simply Organized is great for displaying each child's latest and greatest individually.
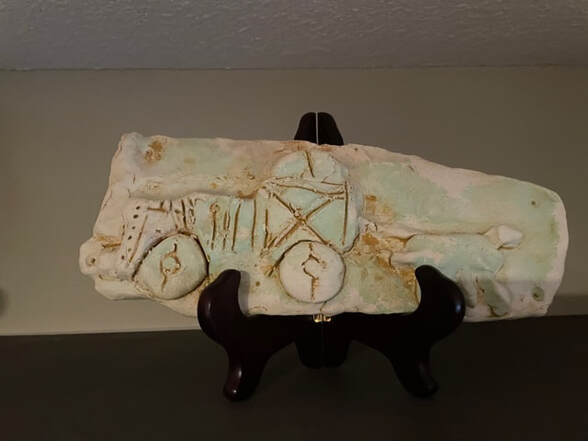
Our youngest son's fourth grade art teacher was obsessed with sculpture. Here in my home office, there are no less than five of his creations on display. He is 20 now, but I still love them (especially the elephant). In a previous home, I had one of his creations on display in the living room. It was resting on a set of built-in shelving which also housed many of our treasures from the Middle East. At a dinner party we were hosting, the wife of my husband's boss was admiring the contents of the shelves. After singling out a handful of pieces, she pointed to our son's sculpture and asked, "Where did that come from?" When I told her my fourth grader made it, she said, "Really? I thought it was some sort of ancient relief sculpture!" Long Term PreservationFile It: When it's time to retire a piece of artwork, there are a variety of options for curating items long term. The simplest and most obvious is to create a filing system or binder for preserving extra special pieces. When the filing system starts to get crowded, sort through it and thin it out with the input of the artist. Photograph It: Awkwardly shaped or sized pieces or items that won't withstand the test of time (think macaroni sculpture), can be photographed or scanned as a means of preserving them. In addition to a photo of the item, be sure to take a photo of the artist with their artwork. Photos and scans can be used to create an artwork portfolio. This can be achieved either by printing the photos and inserting them into an album or by creating a photo book online. Provide journaling (yours or the child's) that tells about the piece - when and why it was created, what it is, and how it was produced. For more on this topic, see my post When a Photo Is Sufficient. Artkive It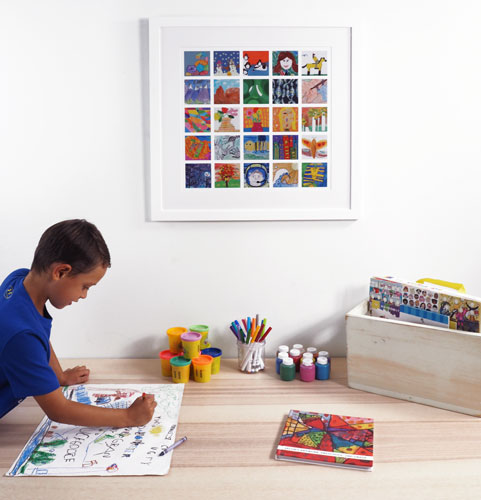
Too busy to scan all your kids artwork? Don't have the necessary technology to preserve their artwork digitally? No worries. Artkive will send you a box. You fill it with 25 of your child's best works of art and mail it back to them. They will turn it into a custom gallery quality mosaic print complete with smooth white matting and white wooden frame (overall size is 26" x 26"). You also have the option to choose a photo book instead (or in addition). Gift It: Children's artwork makes a fun gift, either in its original form or repurposed from a photograph or scan. The following individuals would most likely be pleased to receive an artistic gift from your child:
Speaking of gifts, if your child likes to draw on newsprint, consider using one or more of their creations as gift wrap. And speaking of sharing, scanned artwork can be saved to a file or disc and shared. Save it to an SD card and insert it in an electronic photo frame to enjoy an ever-changing display of your child's creativity. Preserving kids' artwork in this format allows you to manipulate it in various ways. Use it to create calanders, magnets, coasters, mouse pads, notecards, mugs, t-shirts, decorative pillows, face masks, and more.  Children can be sensitive about their creations, expecting parents to hold onto every scrap of paper they ever scribbled on. By taking on the role of curator, you demonstrate to your child that you appreciate their work and care about preserving it. You also help them to understand that there are different ways to preserve and enjoy their creations, that not all creations are created equal, and that learning to be discerning allows them to create a portfolio they can feel proud of.
 Do you have boxes of old memorabia, awards, kids' artwork, souvenirs, and other odds and ends that you haven't looked at in years? What causes you hold onto these things? One distinct possibility is a sense of obligation. You may be thinking something like:
Or some similar form of self-imposed censure or guilt... The thing is, if the items were truly important to you, they wouldn't be boxed up in the attic or basement or closet. They would be on display or in use because that is what we do with the things that we love. Chances are, you've forgotten about many of the things that lay buried in the bottoms of boxes and stashed in the darkest recesses of your home's storage spaces. While you may enjoy a brief moment of reminiscence upon being reunited with these items, you are not likely to miss them should they cease to inhabit a place in your plane of existence. Still, getting rid of the guilt that keeps you from getting rid of the things you feel duty bound to keep is often harder than getting rid of the items themselves.  The good news is there is a way to preserve the memories and relationships and history associated with things without keeping the actual objects. The solution is photographs combined with scrapbooking or journaling. They say a picture is worth a thousand words, but taking the time to add a little information to accompany your photos will only add to the value of the image. Implementing the Photographic Method of DeclutteringSome things are better suited to the photographic method of decluttering than others. You aren't likely, for instance, to feel the need to photograph kitchen utensils or other tools that you no longer use in order to preserve a memory of them. Indeed, you are also not likely to feel duty bound to keep such items. The kinds of things that can be well-preserved with a photograph are the kinds of things we hold onto for sentimental reasons - they remind us of someone or something that we value. Let's look at a few examples and how to use photographs and journaling to let things go. Kids' Artwork Kids tend to be prolific artists. While some of their work is truly memorable and worthy of preservation in its original form, the sheer volume makes it difficult to justify keeping all your child's artwork. Instead of storing boxes of underappreciated art, photograph or scan your kid's creations. You can then use the photos to create other things like calendars, stationery, notecards, coffee mugs, coasters, and more. Consider taking a photo of your child with his or her creation, or if they are making it at home, photograph them in the process of creating. You can also take a video of them working on their masterpiece and ask them to describe it to you. 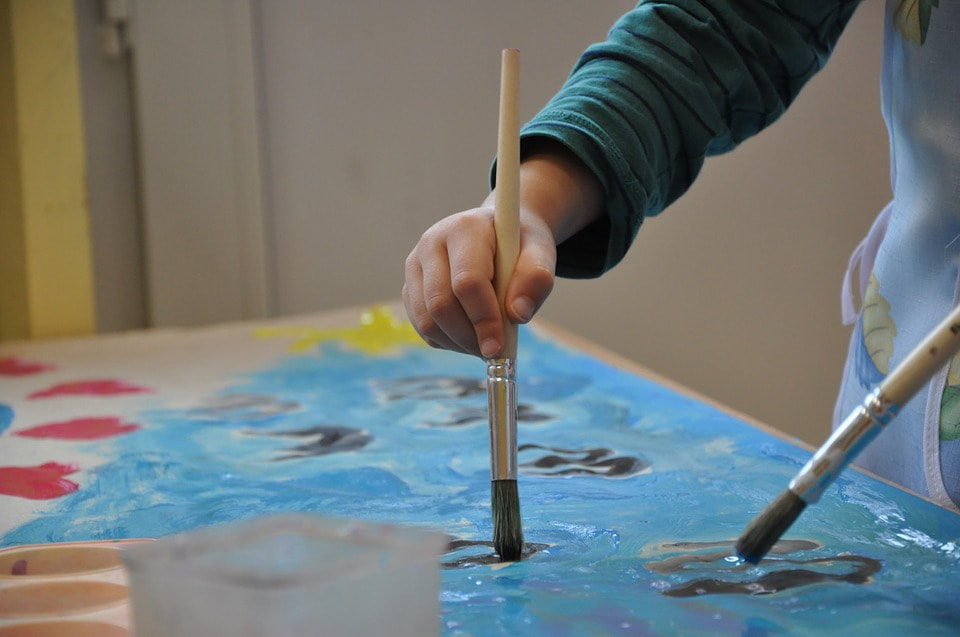 Certificates A cheap and simple way to recognize or thank someone within an organization is to give them a certificate. The important thing to keep in mind when sorting through piles of certificates is that the real value is in the gesture, not the piece of paper itself. Some certificates are worth keeping, others can be disposed of down the road. Only you can determine which is which as it is a personal decision. One nice thing about certificates is that they fit nicely into page protectors which can then be inserted into scrapbooks. Whether you decide to photograph a certificate or keep the original, I recommend writing down the circumstances under which it was received. While the who, what, and when may be included on the certificate, a brief explanation of the larger context can add meaning, particularly for children and grandchildren when the time comes for them to sort through your things. Trophies and Awards My husband served for more than 28 years in the United States Army. In the military awards are often given at the end of each assignment and are often accompanied with a gift (usually a wall hanging of some sort). For part of my husband's military career, he worked extensively with foreign militaries who also felt the need to provide him with gifts, often just for visiting their unit or for some other brief interaction. For many years, we kept the vast majority of these items in boxes. When we bought our first home near the end of his career, we decided to create what my husband calls an "I love me wall" to display all the things he had accumulated over the years. We chose a stairwell and used it to create a collage wall (walls, really). Then we moved, and there was no such space in our new home, so we decided it was time to be discerning about what we kept. Certificates were removed from their frames and placed in page protectors as described in the previous section. Some items were tossed out. Others were photographed, and a select few made it onto a new display wall in the basement. Of the items we opted to photograph, the following information was included:
Similar efforts could be made to preserve children's sports trophies and other common awards. Take a photo of the child with their trophy (preferably in their uniform, and ideally with their coach). Then write down the key information.: the name of the league they played in, the time frame, the coach's name, their win-loss record, what position the child played, his or her stats for the season, and any other relevant information that you or your child might like to recall at some later date.  Souvenirs Souvenirs can take many forms from a pamphlet or ticket stub to a cheap trinket to an expensive artifact. We often hang onto all of them, no matter their value. Paper souvenirs can easily be placed in a scrapbook along with photos of the event or vacation with which they are associated. Other bulkier items require some consideration. Often in the midst of a vacation, a cheap knick knack may catch our attention. Once home, these inexpensive remembrances frequently end up in a box of "keepsakes'. That's fine if you have endless space to store stuff you rarely (if ever) look at. If not, consider photographing the less-than-display-worthy items and then getting rid of the objects themselves. Once again, it is recommended that you record any relevant information about the event or vacation to accompany the photograph. Where is it from? When were you there? What was it about the object that initially appealed to you? 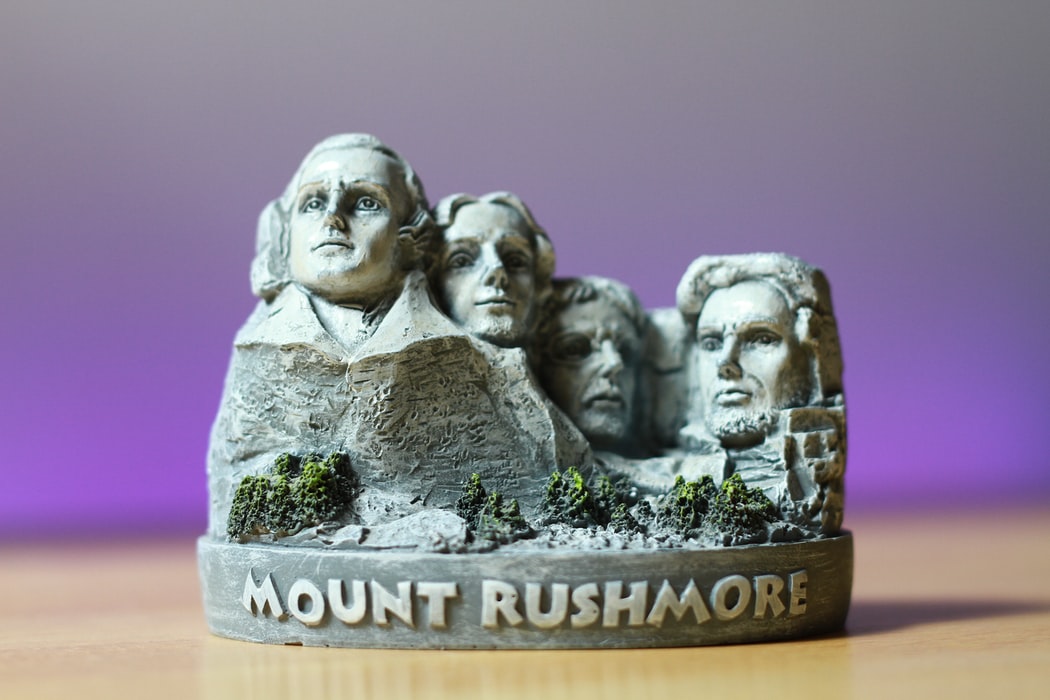 I've just listed a few of the general kinds of items you might consider photographing as a means of decluttering. Now that you have a feel for this approach, consider applying the photographic method of decluttering as a means of downsizing any memorabilia or other knick knacks you may have stashed away in boxes somewhere. It's simple. Take a picture and toss the item. Be sure to document the item's significance in writing. Then reclaim the storage space those items have been hoarding. You may find that you actually get more enjoyment out of looking at the photos than you ever did having the items stashed away in boxes out of sight.  |

Archives
November 2022
Categories
All
|
 RSS Feed